Easy Mode: Upload Your Designs in Three Steps
Easy Mode is the guided upload in Merch Titans: add your designs, turn on the marketplaces you sell on, let AI write the listings, then press Start upload. That opens the upload screen with every listing ready, where you press Start upload again to send them to up to five marketplaces at once.
Updated 2026-11-06 · Markdown
Steps
- 1
Open Easy Mode
Click Easy Mode in the sidebar, or Start Easy Mode on Home.
- 2
Add your designs
On step 1, drop your PNG or JPEG files on the drop area, or click it to choose files. Then click Next: Where to sell.
- 3
Choose where to sell
On step 2, turn on each marketplace you want. If a card says Missing, click it and finish that marketplace's settings, then click Next: Listings.
- 4
Write your listings
On step 3, click Write listings with AI, or type the title and other fields yourself. You can edit anything before you upload.
- 5
Check trademarks (optional)
Click Check trademarks, choose the classes and click Start Check. Open the badge on any design that doesn't say No Issues.
- 6
Press Start upload
Click Start upload. Merch Titans checks every listing and opens the upload screen with one row per listing for each marketplace.
- 7
Start the upload
On the upload screen, check the ticked listings and press Start upload again. On a computer that isn't activated yet, Merch Titans asks which subscription to activate it on.
Before you start
Set up each marketplace you want to sell on first: Amazon Merch, Printify, Printful, Redbubble and TeePublic. Easy Mode shows you what's missing, but you finish the settings on each marketplace's own page.
You can open Easy Mode four ways:
- Easy Mode in the sidebar.
- Start Easy Mode on Home.
- Start Easy Mode on the Upload Status page, before your first upload.
- Next: add your designs on a marketplace page. This also turns that marketplace on.
The bar at the top shows the three steps: 1 Designs, 2 Where to sell and 3 Listings.
Step 1: Add your designs
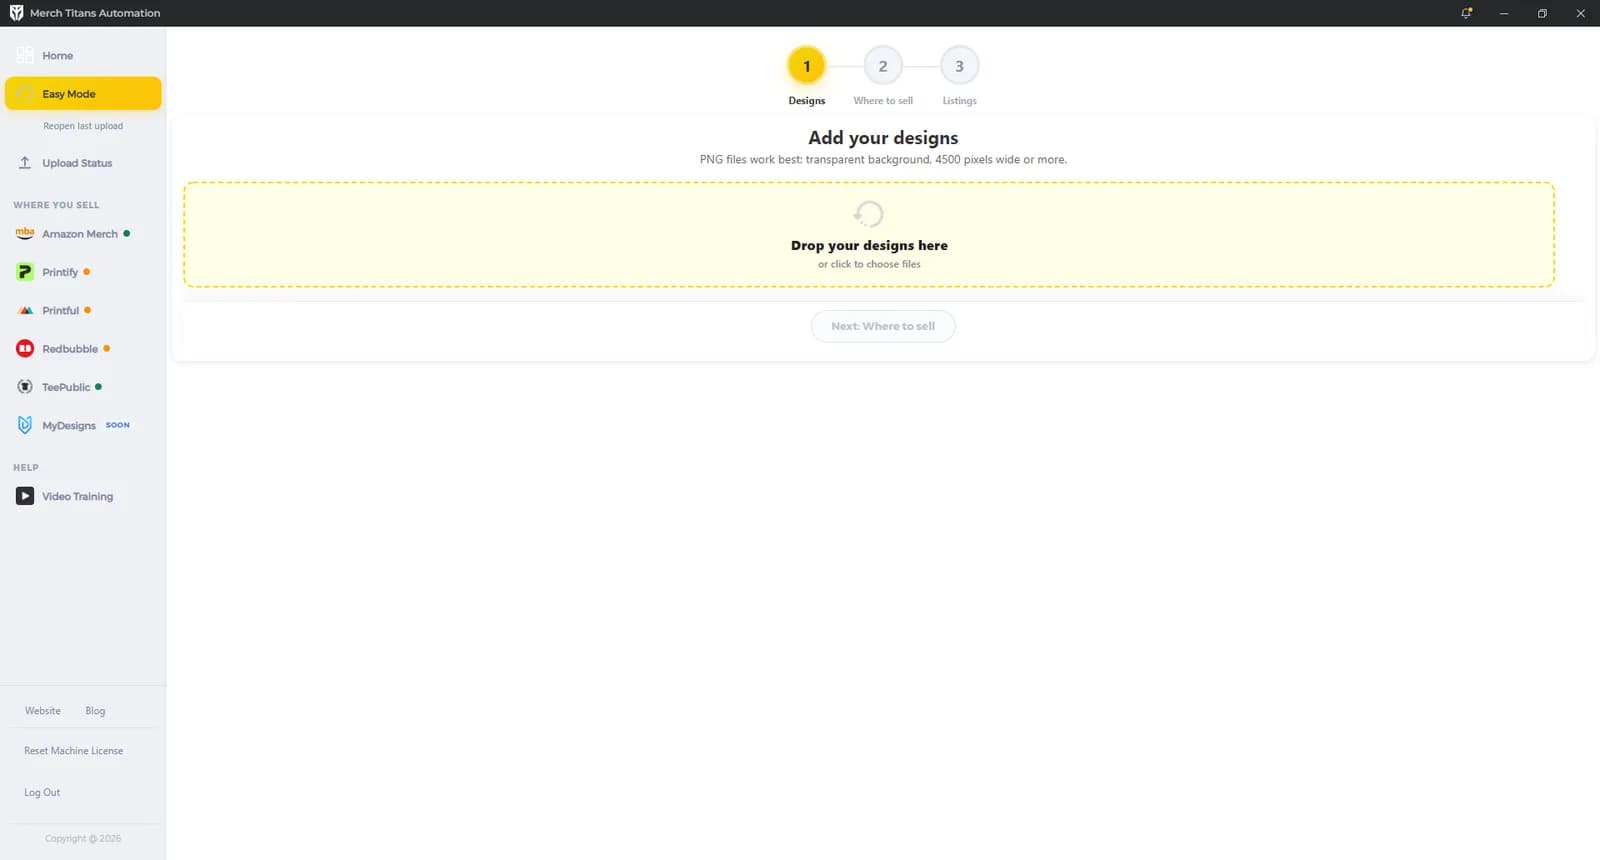
Drop your files on Drop your designs here, or click it to choose files. You can add several at once.
Easy Mode takes PNG and JPEG files. It checks that each file really is a PNG or JPEG inside, and skips any that aren't:
- "Please select PNG or JPEG files only." means none of the files you chose were PNG or JPEG.
- A message such as "2 files aren't real PNGs or JPEGs, so they were skipped." means those files have a PNG or JPEG name but aren't one inside.
The page recommends "PNG files work best: transparent background, 4500 pixels wide or more." That is advice. Easy Mode doesn't check transparency, width, DPI or file size, so check your files before you add them. Printify and Printful check print resolution when they upload.
Your designs appear under Added Designs. Clear All removes every design once you confirm with Yes, Clear All, and this can't be undone. Next: Where to sell turns on once you've added at least one design.
Step 2: Choose where to sell
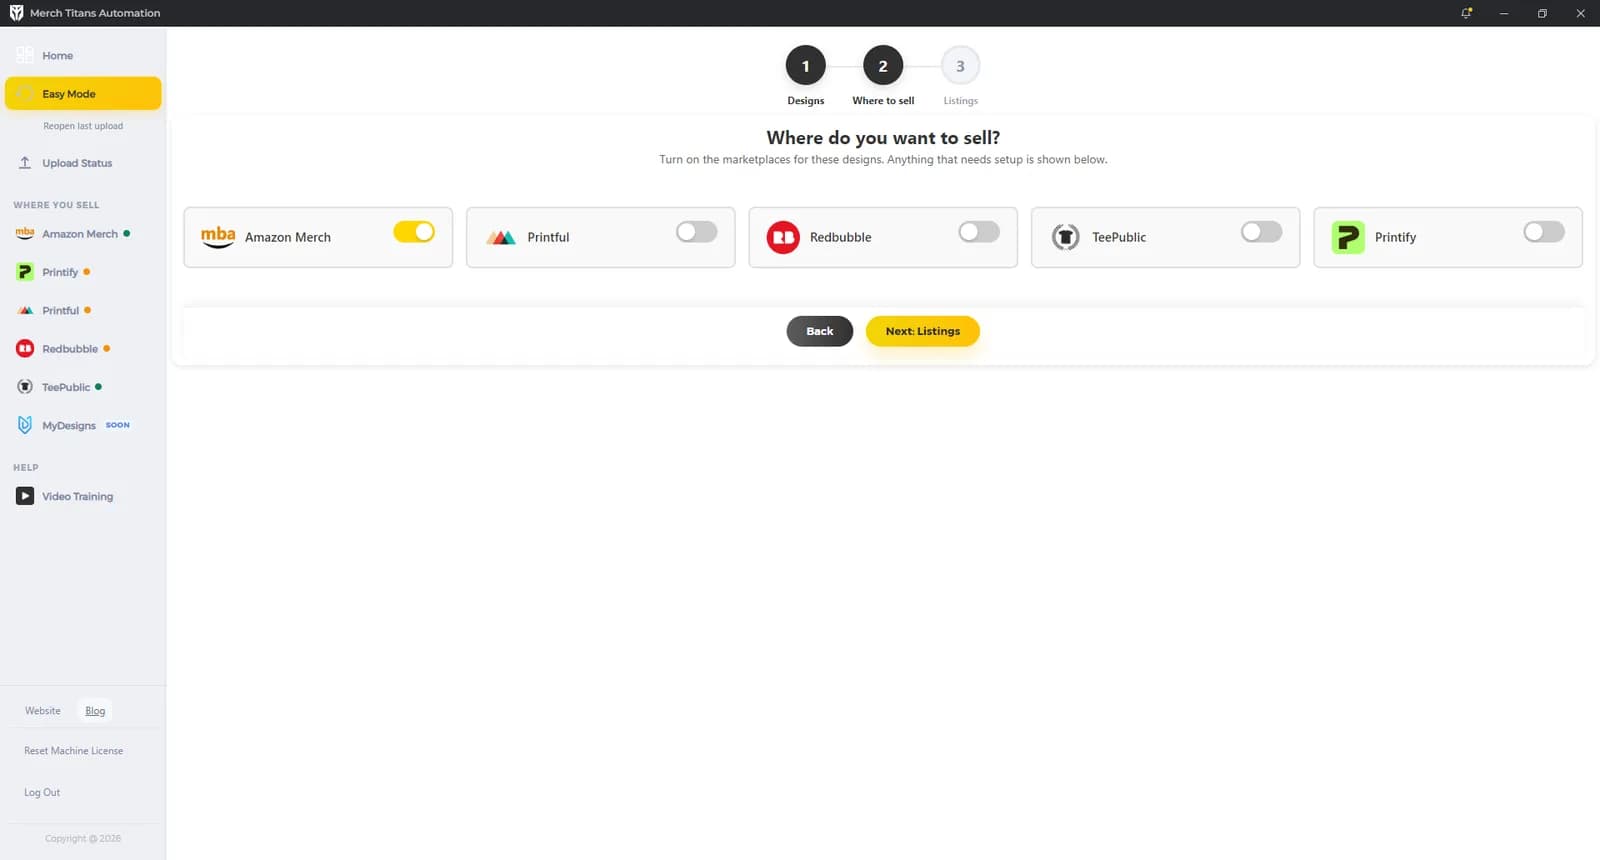
Step 2 lists Amazon Merch, Printful, Redbubble, TeePublic and Printify, each with a switch. These are the same switches as Where you sell on Home: turn one on here and it's on there too. Printify and Printful also have a Store drop-down, the same choice as on their own pages.
Each marketplace you turn on gets a card:
- "Settings look good" means it's ready.
- "Missing:" lists up to three things to finish, plus a count if there are more. Click the card to open that marketplace's settings page.
With nothing turned on, the page says "Turn on at least one marketplace to continue."
| Marketplace | What it needs before you continue |
|---|---|
| Amazon Merch | The settings on the Amazon Merch page |
| Printify | "Connect your Printify account" (or "Replace your Printify token"), "Choose a store", "Add a product" |
| Printful | "Connect your Printful account" (or "Replace your Printful token"), "Choose a store", "Add a product to copy", "Add your company details for the EU safety information" |
| Redbubble | "Choose your template" |
| TeePublic | A Background colour written as a 6-digit hex code |
This check looks at settings only. It doesn't check that you're signed in to the marketplace.
Click Next: Listings when you're done. If nothing is turned on, you'll see "Please select at least one platform". If a marketplace isn't set up, you'll see "Please complete your platform settings before continuing:" followed by the marketplace and what's missing.
Step 3: Review your listings
Each design gets a card with its number, a thumbnail, the file name and size, and the fields your marketplaces need. Remove takes a design off the list.
| Field | Shown when | Limit | Required |
|---|---|---|---|
| Title | Always | 60 characters, or the store's limit when only Printify or Printful is on | Yes |
| Description | Always | 2,000 characters | When Printful, Printify, Redbubble or TeePublic is on |
| Tags | Printful, Printify, Redbubble or TeePublic is on | None | Yes, when shown |
| Primary Tag for TeePublic | TeePublic is on | 48 characters | Yes, when shown |
| Amazon Merch Brand | Amazon Merch is on, or your Printify store is on Amazon | 50 characters | Yes, when shown |
| Amazon Merch Bullet #1 and Amazon Merch Bullet #2 | Amazon Merch is on | 256 characters each | No |
Type tags separated by commas. When Printify or Printful is on, a note above the cards shows the title and tag rules Easy Mode is writing for.
Fill in the listings
- Write listings with AI writes the fields for every design from the image. See Write listings with AI.
- Check trademarks looks for trademark matches and risky words in your text. It's optional. See Check trademarks.
- AI instructions and bulk edit opens two tools:
- Custom instructions (optional): extra rules or context the AI follows for every design.
- Bulk edit: choose a Field to update, type in Text to add and click Add Text to add it to every design. Clear Field empties that field on every design after you confirm.
The app highlights the button it suggests next: Write listings with AI until a design has a title, then Check trademarks until every design has a result, then Start upload. It's only a suggestion. Nothing is blocked.
If Amazon Merch is on, On Amazon: lets you pick Publish or Save as draft. This changes the same setting on the Amazon Merch page.
Export spreadsheet saves your listings instead of uploading them. Pick a folder, and Merch Titans writes the spreadsheet there with a designs folder of image copies, shows "Export completed." with the file's location, and opens the folder. You can upload that file later with a spreadsheet upload.
Clear all removes every design once you confirm.
What Start upload does in Easy Mode
When you click Start upload on step 3, Merch Titans:
- checks your listings. With no designs you'll see "No designs to upload". If a marketplace isn't set up, you'll see the settings message from step 2 and go back to step 2;
- sets the Where you sell switches on Home to exactly the marketplaces you chose;
- builds an upload list from your designs, named
easy-mode-designsplus the date and time; - opens the upload screen.
If a listing has a problem, you'll see "Please fix the following errors:" with one line per problem:
| Message | What to do |
|---|---|
| "Design 1: Title is required" | Add a title |
| "Design 1: Title is over 60 characters, the limit for the marketplaces chosen" | Shorten the title (the number is your limit) |
| "Design 1: Title needs at least (number) characters for this store" | Lengthen the title to your store's minimum |
| "Design 1: Description is required" | Add a description |
| "Design 1: Tags are required" | Add tags |
| "Design 1: TeePublic Primary Tag is required" | Add a primary tag |
| "Design 1: Amazon Merch Brand is required" | Add a brand |
On the upload screen
The upload screen has one section per marketplace and one row per listing. When you press Start upload there, Merch Titans:
- checks your license and, on a computer that isn't activated yet, activates it. See License and computers;
- skips any marketplace with no ticked listings. If nothing is ticked, you'll see "Tick at least one listing, then start the upload.";
- starts each marketplace 2 seconds after the one before, then runs them all at the same time.
The full list of checks is in Spreadsheet upload. Follow progress on Upload Status.
If Start upload does nothing
Home has a box, I agree to assume all responsibilities and risks that may be involved by using this tool., ticked to start with. If it's unticked, Easy Mode's Start upload can't open the upload screen, and no message tells you why. Tick it again on Home.
What Easy Mode keeps when you close the app
Easy Mode keeps your designs (a copy of each file), their text, the marketplaces you chose and the step you were on. Trademark results aren't kept, so run Check trademarks again after you restart.
Reopen last upload in the sidebar takes you back to the upload screen for your last Easy Mode upload. See Upload Status.
Questions
Do I need my own AI key?
No. AI listing writing is built into Merch Titans. The only AI setting is Custom instructions (optional), under AI instructions and bulk edit on step 3.
I pressed Start upload in Easy Mode. Why hasn't anything uploaded?
Easy Mode's Start upload checks your listings and opens the upload screen. Press Start upload again on that screen to begin the upload.
Does Easy Mode check my design's size or transparency?
No. Easy Mode only checks that each file is a real PNG or JPEG. A transparent PNG 4500 pixels wide or more is the recommendation, and Printify and Printful check print resolution when they upload.
Do I have to run the trademark check?
No. Check trademarks is optional, and Start upload doesn't need it. It flags trademark matches and risky words in your text, so it's worth running before you upload.
Is my Easy Mode work saved if I close the app?
Yes. Your designs, their text, the marketplaces you chose and the step you were on are kept. Trademark results aren't, so run Check trademarks again after you restart.